

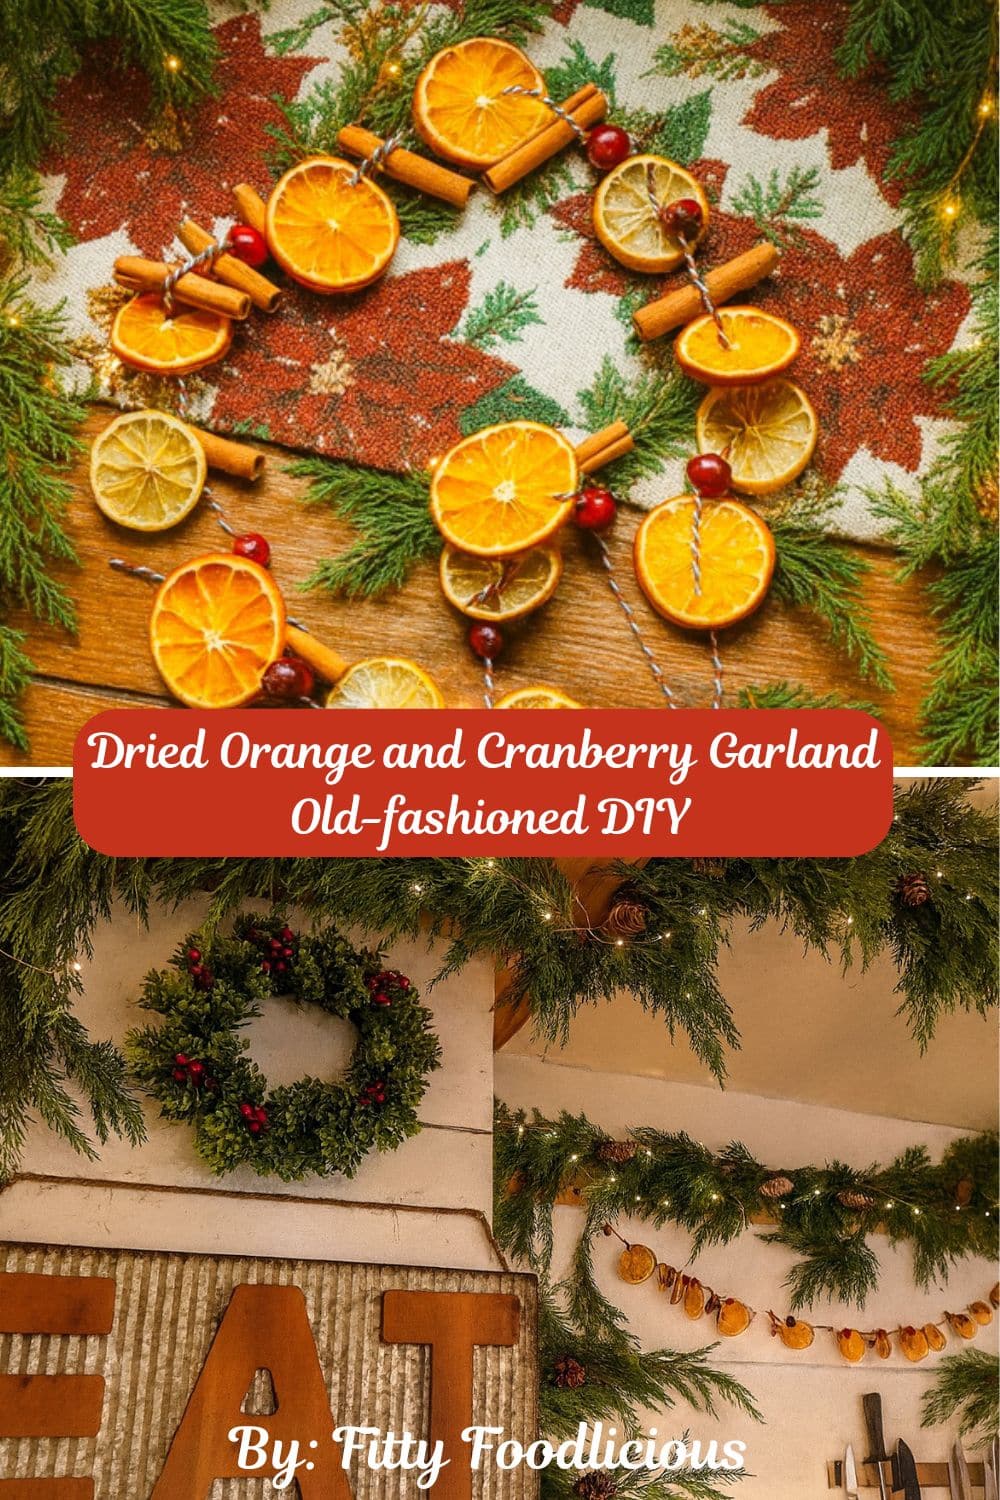
Dried Orange and Cranberry Garland is the perfect homemade festive decor idea for your home and it makes a lovely Christmas gift idea! Dried orange and cranberry garland diy is a thoughtful decor idea that's sure to impress you guests. You only need a few ingredients and hands for this classic vintage garland idea.
Dried orange and cranberry garland recipe is a lovely way to add decorations with dried orange slices into your home. Bonus, if you Shellac it correctly, it will last for generations to come. You can pass it down to loved ones and let the homemade garland tradition continue on! Want some more homemade Thanksgiving ideas? My Fall Simmer Pot Recipe | Simple Cozy Autumn Potpourri is a fantastic way to make your home smelling good for all of your guests. Want a fun Christmas gift idea? Make my Diy Hot Cocoa Gift Set Jar (Easy Homemade Idea) these sell out each year and for good reason! Need a quick and easy breakfast idea? I've got you covered with my Pumpkin Pop Tarts Homemade with Frosted Maple Icing these are the best Thanksgiving breakfast idea!
Jump to:
- Why you'll love this diy orange garland
- Supplies to make a DIY garland with oranges and cranberries
- What you'll need for DIY Orange Slice Garland for the Christmas Tree
- Top Tip
- Pro Tip for how long do cranberry garlands last
- Tips!
- More Christmas Recipes
- Pin or send this recipe to a friend!
- Follow Us
- 📖 Recipe
- 💬 Comments
Why you'll love this diy orange garland
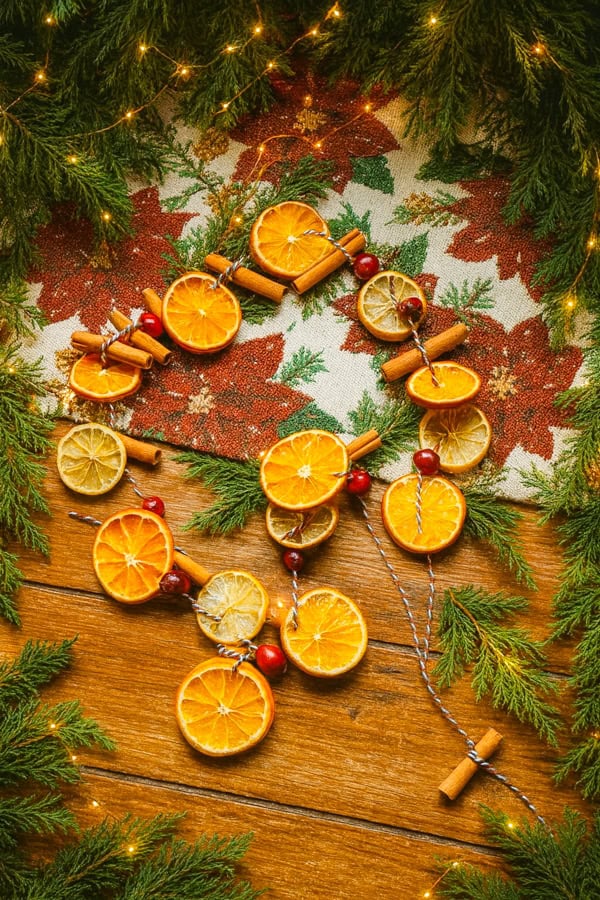
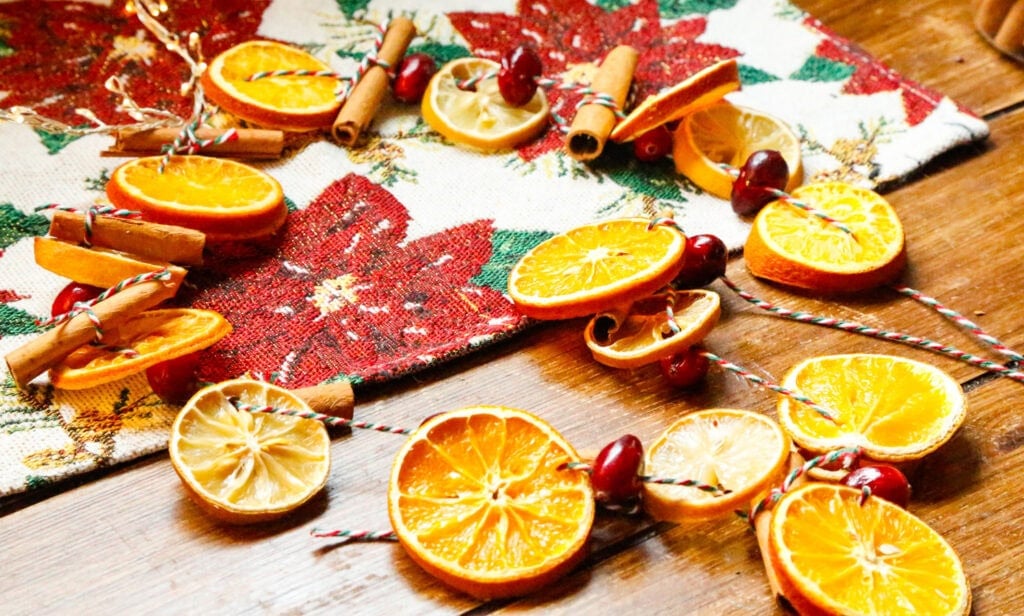
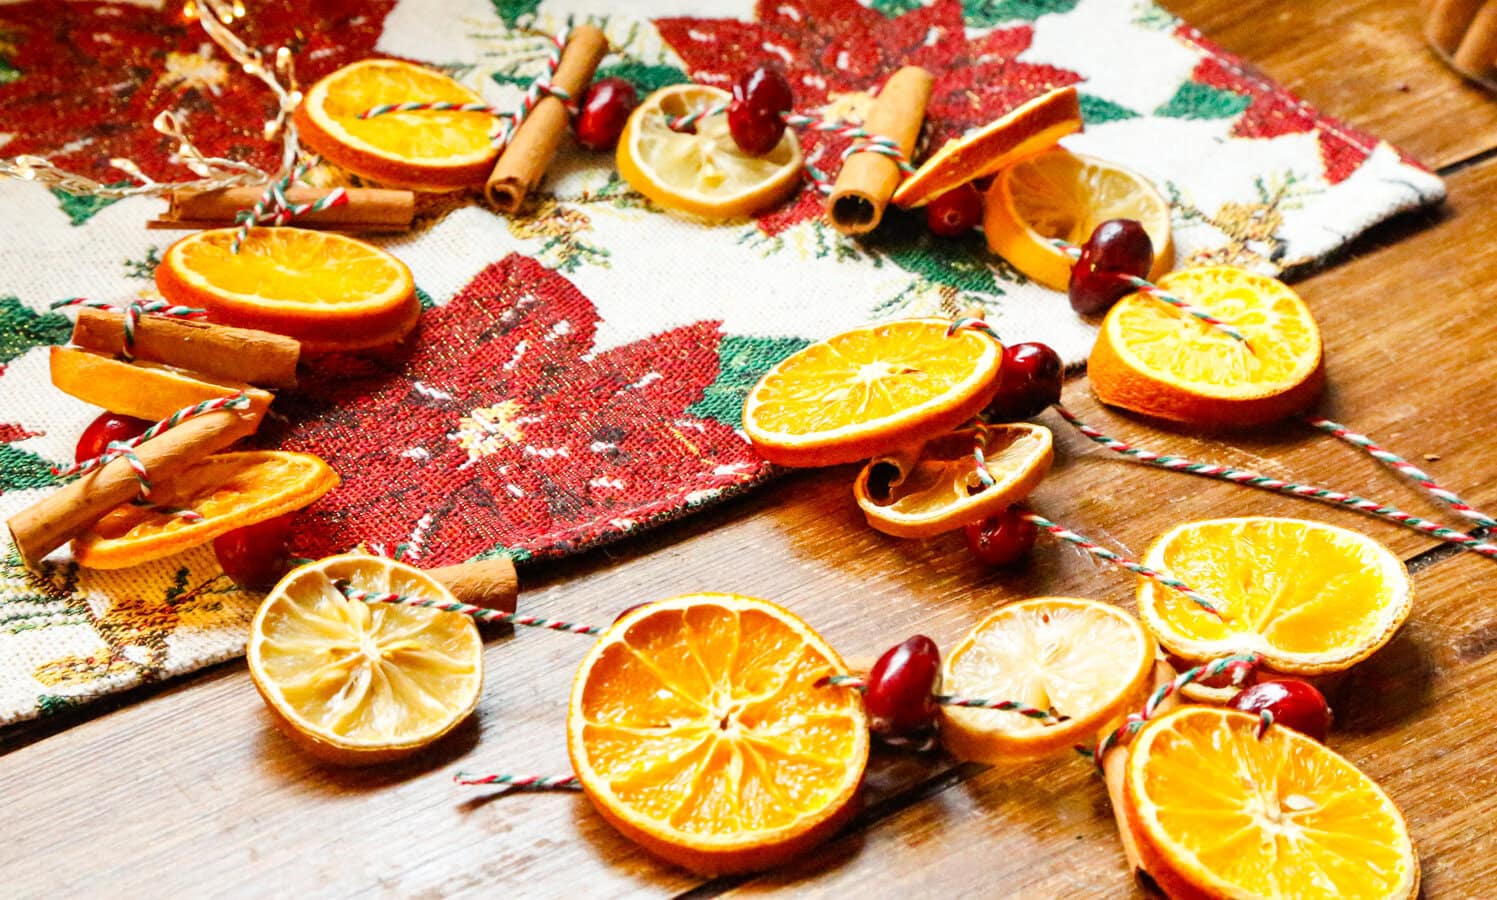
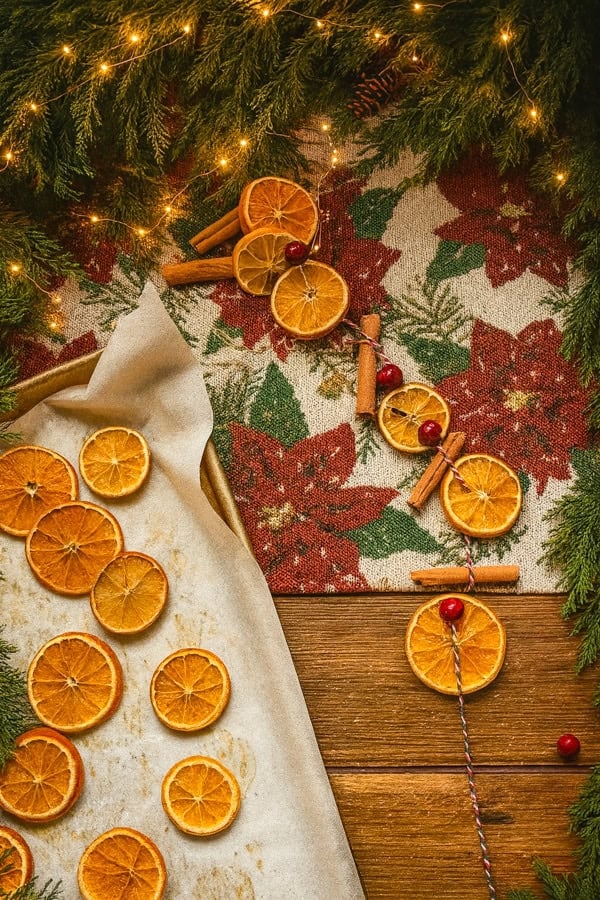
The deep garnet-red of fresh cranberries paired with the warm, translucent glow of dried orange slices creates a vibrant, classic holiday look. It adds a natural, rustic, and timeless charm to any home decor.
Supplies to make a DIY garland with oranges and cranberries

What you'll need for DIY Orange Slice Garland for the Christmas Tree
- Sliced Oranges and Lemon Slices: You can use oranges and lemons that a few days old. I find these actually work better than using super fresh ones as they don't take as long to dry out.
- Fresh Cranberries: No need to dry them out first, because will be shellacking them later.
- Cinnamon Sticks: I just love the smell of cinnamon sticks, don't you? They are glorious and really add a rustic touch to this lovely dried oranges and cranberry garland.
- Christmas string or wire: I use Christmas colored string for this garland, but garden string, burlap string, or wire works jus as well. Wire is a good option because you can mold the garland how you want it when hanging.
- Large Knitting Needle: Make sure you get a knitting needle with a large eye so you can easily get the twice through it and easily pierce the fresh cranberries.
- Shellac: This keeps the garland from getting fruit flies all over it and will make it last for generations to come. Don't skip this step!
See full recipe card below for exact quantities.
Top Tip
- You can also add sage leaves, rosemary, bay leaves or mint leaves for a super festive sparkle touch!
Step 1
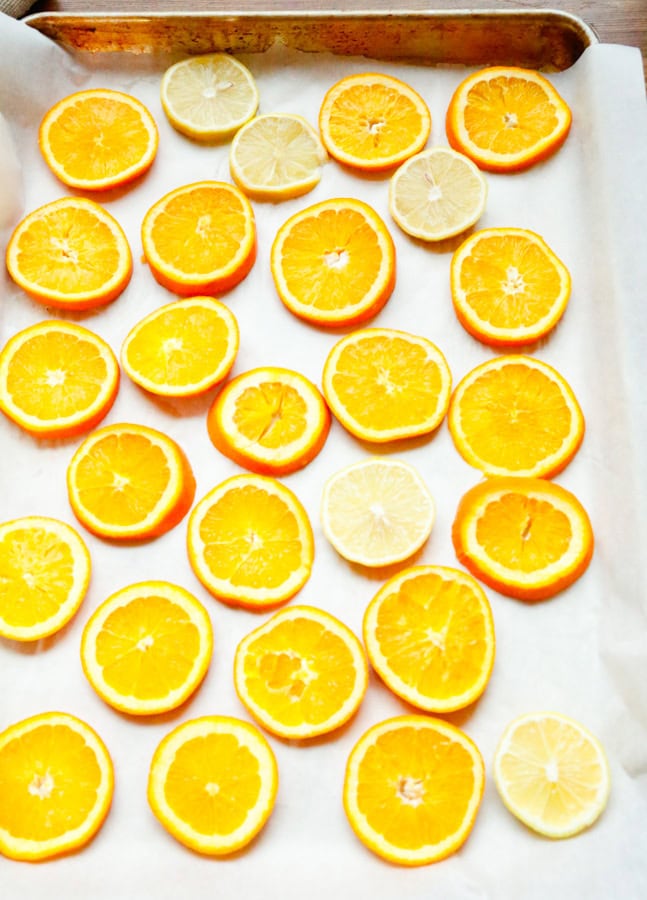
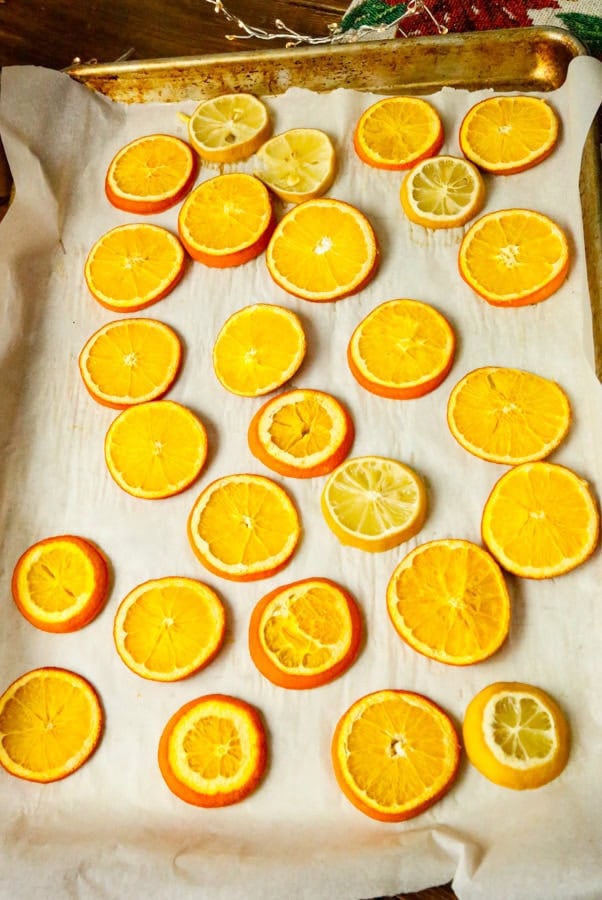
Step 1: Slice and dry the orange and lemon slices. You'll want to slice them into ½-inch slices using a sharp knife and lay them on a parchment lined baking sheet and pat them dry with a paper towel to remove excess juices.
Step 2
Step 2: Set you oven to 200-degrees **don't go above this setting, take it from me. I did and I burnt my oranges to a crisp and I had to start all over!** Bake 2–4 hours, flipping halfway, until dry and no longer sticky.
(They should look leathery, not brown.)
Step 3
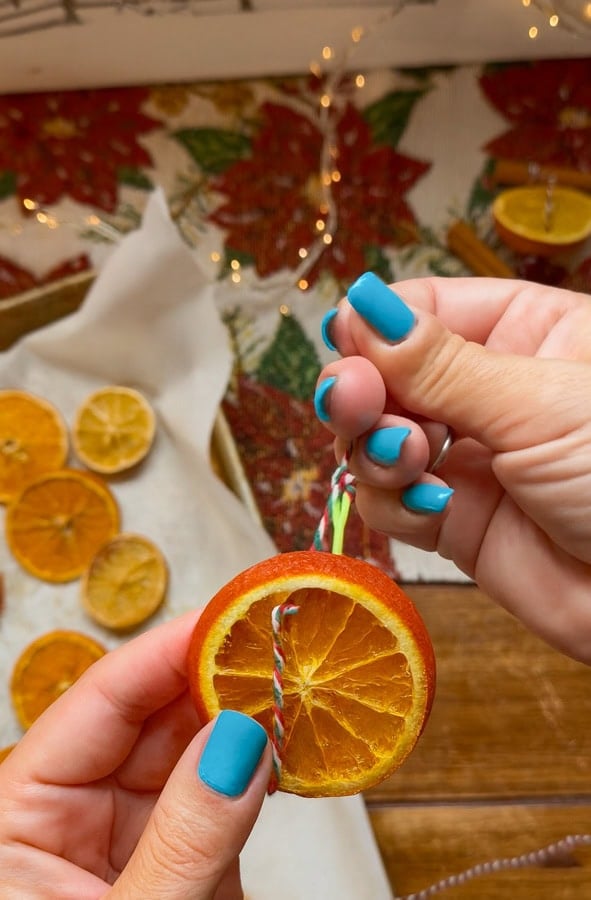
Step 3: Once the orange and lemon slices are dry it's time to thread the garland. Cut a long piece of thread or fishing line (3–8 feet depending on your project). Thread your needle and knot the end several times so cranberries don’t slip off.
Step 4
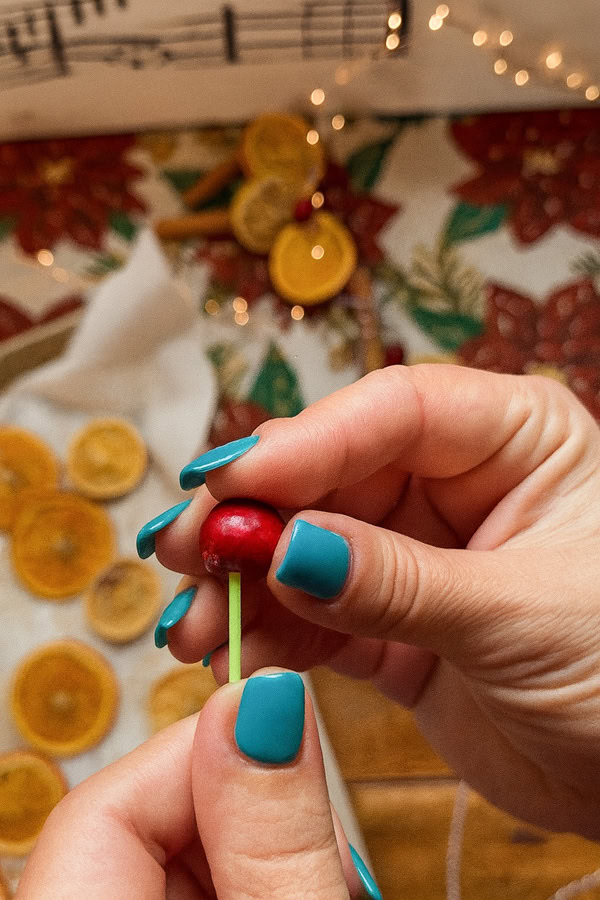
Step 4: Begin threading cranberries. Push the needle through the center of each berry then add an orange slices in between (go through the edge of the slice). Next, tie on the cinnamon stick and so on.
Repeat pattern like: cranberry, cinnamon stick, orange slice, and lemon slice.
Step 5:
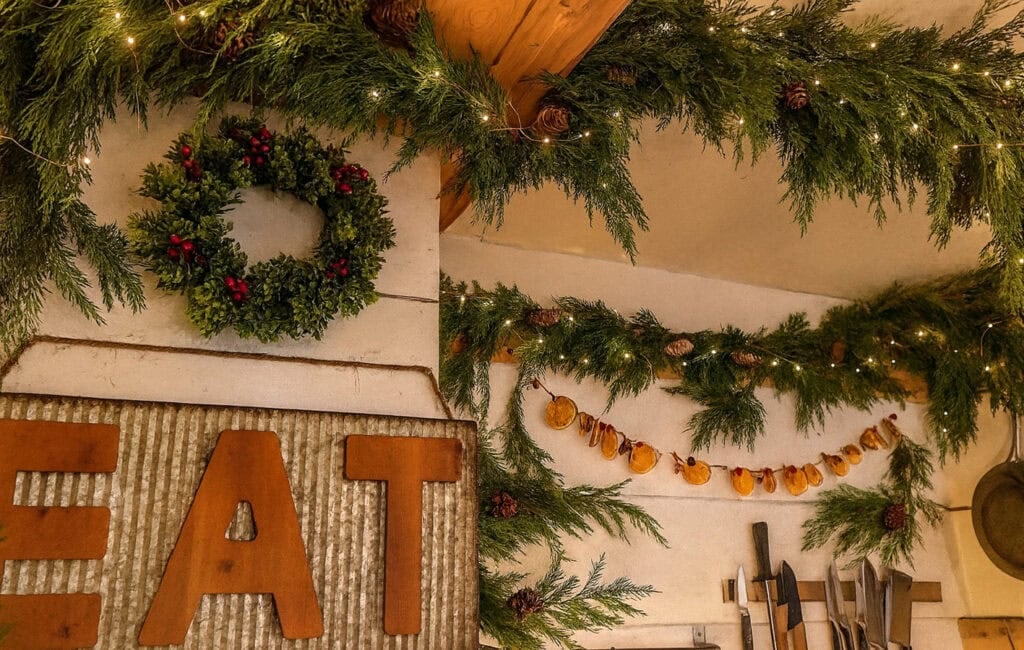
Step 5: Step 4 — Hang or Decorate, your cranberry string christmas decorations
• Christmas tree
• Mantel
• Window
• Stair railing
• Wreath
• Table centerpieces
If hanging outside, it also becomes a bird-friendly feeder as long as you don't add Shellac to it! 🐦
Pro Tip for how long do cranberry garlands last
- Rinse cranberries and remove any soft ones. Pat them dry — dry berries last longer and are easier to thread.

You can, as long as you shellac it or Mod Podge it. If you don't shellac or put some type of sealant on it, it will rot, mold, and become an haven for fruit flies. I strongly suggest spraying your how to make an orange slice garland with a crafting seal spray or mod podge it after and let it air dry before hanging.
Yes! This is exactly what I do. But with homemade garland that I would like birds to enjoy after Christmas, I leave these one outside around my home and I do NOT spray them with a shellac or sealant of any kind as that's super toxic to our precious birdie friends.
Tips!
- Want to save yourself a lot of time and effort? Order the dehydrated oranges and lemon slices online. Shhhh! Your secret is safe with me. 😉
- This saves you gas and electricity since you don't have to use your oven.
- No need to shellac pre-ordered orange and lemon slices as they will already be done for you.
More Christmas Recipes
- Candy Cane Hot Chocolate | Peppermint Holiday Cocoa
- Panettone French Toast | Delicious Breakfast Recipe
- Pretzel Reindeers | Fun No-Bake Easy Christmas Recipe
- Easy Christmas Popcorn | Festive Holiday Snack Treat
- Santa Hat Shirley Temple | Festive Christmas Mocktail
- Baked Christmas Donuts Recipe | Glazed and Homemade
- Stove Top Stuffing With Cornbread | Homemade Dressing Recipe
- Sugar Plum Cheese Danish | Starbucks Copycat Recipe


Pin or send this recipe to a friend!
Share Fitty Foodlicious recipes with your friends and family! We won't mind. 😉
Follow Us
If you make this recipe, please leave a star ⭐ recipe rating at the bottom of the page on the recipe card. This provides helpful feedback to both me and other readers and cooks! If you want more delicious, made-from-scratch, wholesome, and healthy recipes, you can subscribe to my newsletter and follow along on my adventures on Instagram where I'm convinced I'm a comedian 😂 Check out our Pinterest for even more recipe inspiration and Facebook for the recipe of the day!
Be sure and follow, like, and share Fitty Foodlicious with your friends and family!

About Genevieve
Thank you for stopping by Fitty Foodlicious, a website dedicated to sharing lasting, family recipes, anxiety tips and tricks, and healthy spirited mental wellness. Genevieve's recipes have been featured on MSN.com, NewsBreak, Food Talk Daily, Food Gawker, Trivet Recipes, Bartender.com, Health Magazine, Kitchen Aid AU NZ, and has a published Cookbook titled The 5-Ingredient Paleo Cookbook which can be purchased at all major bookstores and on Amazon.
📖 Recipe

Dried Orange and Cranberry Garland Old-fashioned DIY
Equipment
- Sharp Knife
Ingredients
- 2 cups Fresh Cranberries
- 2 Oranges
- 2 Lemons
- 1 cup Cinnamon Sticks
- Strong thread, fishing line, or twine
Instructions
- Preheat oven to 200°F (93°C).
- Slice & Dry the Oranges and lemon: Slice oranges into ¼-inch rounds and pat dry with a paper towel. This will help to remove excess moisture from the orange and lemons.
- Place on a parchment-lined baking sheet. Make sure the slices don't touch each other.
- If using an oven, bake 2–4 hours, flipping halfway, until dry and no longer sticky. (They should look leathery, not brown.)
- Rinse cranberries and remove any soft ones. Pat them dry — dry berries last longer and are easier to thread.
- Once your orange and lemon slices are dried and cooled. It's time to start making the dried orange cranberry garland. Cut a long piece of thread or fishing line (3–8 feet depending on your project). Thread your needle and knot the end several times so cranberries don’t slip off.
- Tie a knot at the end of the string and begin to thread the cranberries first. Push the needle through the center of each berry and thread to the end. Next tie on a cinnamon stick, then thread the orange and lemon slices.
- Add orange slices in between (go through the edge of the slice) Repeat pattern like: cranberry, cinnamon stick, orange slice, lemon slice and so on.
- Once you have your Orange Garland decorated how you want it, it's time to Shellack it, if you are not hanging it outside for the birds. Spray shellac or Mod Podge on it. This will ensure it does not rot or get fruit flies. Hang it wherever you want!
- You can keep it in storage after Christmas. It will store in a cool dried place. Enjoy!
Notes
- Add cinnamon sticks for a rustic look.
- Add fresh rosemary sprigs for green cottage-core vibes.
- Add bay leaves to mimic mini “green leaves” in the garland.
- Spray with clear craft sealant if you want it to last longer indoors.
- You can also string it through Christmas lights for extra Christmas Sparkle.


maggie
such a creative idea!My grandkids are coming home tomorrow, and I'll make this garland with them; they love making crafts with their little hands.
Sabine
This was my first time making a garland and it worked out perfectly. Thanks for sharing.
Sandie
I put together this dried orange and cranberry garland today, and it turned out so cute and homey—such a relaxing little DIY to do.